| Aesthetic and Architectural Flexibility |
- Sleek, modern profiles with minimal obstruction.
- Customizable grid patterns and muntin designs.
- Top-hung
Materials and Construction Methods in Casement Window Fabrication
Casement windows combine functionality with aesthetic versatility, requiring careful selection of materials and precise construction techniques to ensure performance, longevity, and energy efficiency. The choice of frame material influences durability, maintenance requirements, thermal resistance, and cost, while assembly methods dictate structural integrity and weatherproofing capabilities. Below, the primary materials used in casement window frames are analyzed, followed by a step-by-step guide for DIY assembly and an overview of weatherproofing integration.
Common Frame Materials and Their Characteristics
The selection of frame material for casement windows balances thermal performance, durability, and budget constraints. Each material—vinyl, wood, aluminum, and fiberglass—offers distinct advantages and trade-offs in terms of insulation, maintenance, and cost. Below is a comparative analysis of these materials, structured for clarity and practical decision-making.
Key Consideration: The optimal material choice depends on climate conditions, architectural style, and long-term maintenance preferences.
Vinyl (PVC)
Vinyl frames are widely adopted for their low maintenance and energy efficiency. Manufactured from unplasticized polyvinyl chloride (uPVC), these frames resist warping, corrosion, and moisture, making them ideal for humid climates. Their hollow chambers trap air, reducing heat transfer, while integrated weatherstripping enhances air sealing. However, vinyl’s limited load-bearing capacity restricts its use in large or heavy casement windows, and exposure to prolonged sunlight may cause UV degradation without protective coatings.Wood
Wooden frames, often crafted from cedar, pine, or mahogany, provide superior insulation and aesthetic appeal, particularly in traditional or custom designs. High-quality wood resists thermal bridging when paired with low-conductivity cores or thermal breaks. However, wood requires periodic sealing, painting, or staining to prevent rot, warping, or insect damage. Engineered wood composites, such as medium-density fiberboard (MDF) or plywood, mitigate some of these issues by combining wood fibers with resins for enhanced stability. Aluminum
Aluminum frames are favored for their strength, lightweight properties, and resistance to corrosion and pests. Thermal breaks—plastic or composite inserts between the inner and outer aluminum profiles—significantly improve insulation by reducing heat transfer. While aluminum offers durability and low maintenance, its high thermal conductivity necessitates thermal breaks for energy-efficient performance. Anodized or powder-coated finishes enhance longevity but may require occasional touch-ups. Fiberglass
Fiberglass frames combine the strength of aluminum with the insulation properties of wood, making them a premium choice for high-performance casement windows. Reinforced with fiberglass strands and resin, these frames resist warping, corrosion, and moisture while maintaining structural integrity. Their hollow chambers can be filled with insulating foam or air, improving thermal resistance. However, fiberglass frames are more expensive than vinyl or aluminum and may require professional installation due to their rigid construction.
DIY Casement Window Frame Assembly: Step-by-Step Guide
Constructing a casement window frame requires precision, as improper assembly can compromise weatherproofing, structural stability, and operational efficiency. Below is a structured guide for assembling a basic casement window frame using wood or aluminum, including essential tools, safety measures, and sequential steps. For vinyl or fiberglass frames, professional installation is recommended due to specialized sealing and hardware requirements.
Safety Precaution: Wear safety goggles, gloves, and a dust mask when handling power tools. Ensure the workspace is ventilated, and secure the window frame to prevent shifting during assembly.
Tools and Materials Required
- Measuring tape, pencil, and speed square for precise cuts.
- Miter saw or circular saw for angular cuts (typically 45° for frame joints).
- Drill with driver bits for screws and dowels.
- Clamps to hold frame sections in place during assembly.
- Screwdriver or impact driver for fastening.
- Chisel for fine-tuning joints.
- Wood glue (for wood frames) or appropriate adhesive for aluminum/fiberglass.
- Weatherstripping, seals, and hardware (hinges, crank mechanism, locks).
- Level to ensure frame alignment.
- Safety equipment (goggles, gloves, ear protection).
Assembly Process
1. Measure and Cut Components
Measure the window opening dimensions, accounting for wall thickness and insulation. Cut the four frame members (two stiles and two rails) to size, ensuring mitered corners at 45° for a seamless joint. For aluminum frames, use a miter box and saw designed for metal to prevent distortion. 2. Dry Assembly and Fit Testing
Assemble the frame without adhesive or screws to verify fit within the window opening. Adjust cuts as needed to ensure the frame sits flush against the wall and operates smoothly when hinged. Use a level to check for plumb and square alignment. 3. Permanent Assembly
Apply wood glue to the mitered joints for wood frames, then clamp the pieces together. For aluminum or fiberglass, use manufacturer-recommended adhesives or mechanical fasteners. Secure the frame with screws or rivets, countersinking heads to avoid protruding edges that could interfere with weatherstripping. 4. Install Hardware
Attach hinges to one stile and the crank mechanism to the opposite stile, ensuring the window opens and closes smoothly. Install locks or latches at the meeting rail to secure the window when closed. For multi-pane designs, repeat the process for each sash. 5. Weatherproofing Integration
Apply compressible weatherstripping to the meeting rails and sashes to create an airtight seal when the window is closed. Use adhesive-backed foam tape or brush-on sealants for stationary joints between the frame and wall. Install drainage holes at the bottom of the frame to channel condensation away from the structure. 6. Final Inspection and Adjustments
Test the window’s operation, ensuring it opens and closes without binding. Adjust hinges or hardware as needed to eliminate friction. Verify that seals compress evenly and that no gaps exist between the frame and wall. Seal any remaining gaps with caulk or expanding foam, ensuring compatibility with the frame material.
Weatherproofing in Casement Window Construction
Weatherproofing is critical to casement window performance, as these windows rely on tight seals and proper drainage to prevent air infiltration, moisture intrusion, and thermal loss. Effective weatherproofing integrates multiple layers of protection, including seals, drainage systems, and structural design elements tailored to the frame material. Below, the components and methods of weatherproofing are detailed, emphasizing their roles in maintaining energy efficiency and structural integrity.
Core Principle: Weatherproofing in casement windows follows the "pressure equalization" concept, where air and water are directed away from the building envelope through controlled pathways.
Sealing Systems
1. Primary Seals (Compressible Weatherstripping)
Installed along the meeting rails and sashes, compressible seals (e.g., EPDM rubber, foam, or silicone) create a dynamic barrier that adapts to the window’s closed position. These seals must be replaced every 5–10 years, depending on material and exposure conditions. For aluminum or fiberglass frames, multi-chambered seals provide superior compression and longevity.2. Secondary Barriers (Static Seals)
Static seals, such as brush seals or adhesive-backed foam tape, are applied to stationary joints (e.g., between the frame and wall or sash and jamb). These seals prevent bulk air leakage but are less effective against high wind pressures. In high-performance windows, secondary barriers are combined with drainage planes to manage condensation. 3. Glazing Seals
The interface between the glass and frame (glazing) is sealed with structural glazing tapes or butyl rubber to prevent moisture infiltration. Insulating glass units (IGUs) with desiccant-filled spacers further reduce condensation risk by maintaining a dry air gap between panes. Drainage Systems
1. Weep Holes and Drain Channels
Casement windows incorporate weep holes at the bottom of the sash and frame to channel condensed moisture or infiltrated water away from the building. Drain channels, often integrated into the frame’s design, direct water to the exterior through capillary action or gravity. Aluminum and fiberglass frames typically feature pre-molded drainage grooves, while wood frames may require custom-milled channels. 2. Pressure-Equalized Chambers
High-performance casement windows use pressure-equalized designs, where the space between the glass and frame is vented to the exterior. This equalizes pressure on both sides of the glazing, reducing the risk of seal failure due to differential pressures. Such systems are common in fiberglass and vinyl frames but can be retrofitted to wood or aluminum with additional hardware. Integration with Frame Materials
- Vinyl Frames: Factory-integrated weatherstripping and drainage channels minimize installation complexity. The material’s inherent resistance to moisture reduces the need for additional sealing layers.
- Wood Frames: Require periodic re-sealing of joints and glazing beads. Custom-milled drainage paths and high-quality paint/sealant systems extend weatherproofing effectiveness.
- Aluminum Frames: Thermal breaks and multi-chambered seals are essential to prevent condensation within the frame. Anodized finishes enhance corrosion resistance in coastal or industrial environments.
- Fiberglass Frames: Combine the durability of aluminum with the

Installation Procedures and Best Practices for Casement Windows
Professional installation of casement windows demands precision in wall preparation, alignment, and securing techniques to ensure durability, energy efficiency, and operational reliability. Improper installation can lead to air infiltration, structural stress, or premature failure, particularly in varying climatic conditions. This section outlines the systematic approach to installing casement windows, emphasizing critical steps, comparative considerations for interior/exterior placements, and post-installation functionality tests.
Wall Preparation and Structural Considerations
Proper wall preparation is foundational to a successful casement window installation, as it ensures compatibility with the window’s weight, load distribution, and thermal performance. The process begins with assessing the existing opening dimensions, material composition (e.g., wood, masonry, or steel studs), and structural integrity. For exterior installations, the surrounding wall must accommodate thermal breaks and weather-resistant barriers, while interior installations may require additional framing to support the window’s operational forces, particularly in high-wind or seismic zones.Key preparatory steps include:
- Removing the old window frame (if applicable) while preserving surrounding insulation and structural supports.
- Measuring the rough opening with precise tolerances (±¼ inch) to account for flashing, insulation, and expansion gaps.
- Reinforcing the header and jambs with engineered lumber (e.g., double-top plates or steel headers) if the existing structure lacks sufficient load-bearing capacity.
- Sealing gaps between the rough opening and window frame using compression seals (e.g., closed-cell foam or backer rod with sealant) to prevent air leaks and moisture intrusion.
Critical Note: In regions with extreme temperatures, ensure the use of low-expansion sealants (e.g., polyurethane or silicone) to accommodate thermal movement without compromising the seal.
Leveling and Alignment Techniques
Casement windows rely on precise leveling and alignment to ensure smooth operation, prevent strain on hinges, and maintain an airtight seal. Misalignment often stems from uneven shims, improper anchoring, or failure to account for the window’s operational arc (typically 90–110 degrees for casements). The following steps standardize the alignment process:1. Installing shims at the nail fin (bottom rail) and header to create a level reference plane. Use adjustable shims (e.g., metal or composite) to fine-tune alignment post-installation.
2. Securing the window frame with screws through the nail fin into the studs, ensuring even pressure distribution. Avoid over-tightening, which can warp the frame.
3. Verifying plumb and level using a laser level or digital protractor:
- Vertical alignment: Check the window’s sides (jambs) for plumb (±1/16 inch per foot).
- Horizontal alignment: Confirm the sill and header are level (±1/8 inch over the entire span).
- Diagonal alignment: Measure from corner to corner to detect warping or twisting.
4. Adjusting the hinges for proper balance by loosening the hinge pins and repositioning the balance weights (if equipped) or counterbalance springs to compensate for glass weight.
Industry Standard: The National Fenestration Rating Council (NFRC) recommends a maximum 1/8-inch deviation from level for optimal performance and longevity.
Securing Methods and Anchoring Strategies
The securing method varies based on the window’s location (interior/exterior), wall material, and local building codes. Exterior casement windows require structural anchoring to withstand wind loads, while interior installations prioritize soundproofing and draft prevention. Common securing techniques include:- Through-fasteners: Screws or bolts driven through the nail fin into studs or hurricane clips (for wind resistance). Minimum 3 fasteners per side are recommended for standard casements.
- Flashing and weatherproofing:
- Exterior: Install metal flashing (e.g., aluminum or galvanized steel) over the window frame and under the exterior siding to redirect water away from the frame.
- Interior: Apply vapor barriers (e.g., polyethylene sheeting) to prevent condensation in cold climates.
- Sealant application: Use silicone or butyl tape around the perimeter to create an airtight and watertight seal, with a backer rod to ensure proper adhesion.
- Insulation integration: Fill gaps between the window frame and rough opening with rigid foam insulation (e.g., extruded polystyrene) to minimize thermal bridging.
Code Compliance: The International Residential Code (IRC) mandates structural anchors for windows in high-wind zones (e.g., coastal or tornado-prone areas), with load ratings specified by the manufacturer.
Checklist for Critical Installation Steps
To mitigate common installation errors—such as air leaks, operational jams, or premature seal failure—adhere to the following verification checklist during and after installation:- Pre-Installation:
- Confirm the rough opening dimensions match the window’s specifications (±¼ inch).
- Inspect the window unit for damage, missing components, or manufacturing defects.
- Gather tools: laser level, shims, screws, sealant, flashing tape, and caulking gun.
- During Installation:
- Ensure the window frame is level and plumb before securing.
- Apply shims evenly at the nail fin and header to prevent stress points.
- Use corrosion-resistant fasteners (e.g., stainless steel or galvanized screws) in humid or coastal environments.
- Install flashing and weatherproofing before attaching exterior siding.
- Post-Installation:
- Test the window’s operation (opening/closing) for smoothness and proper latch engagement.
- Verify seal integrity using an incense stick or smoke pencil to detect air leaks.
- Check for drafts by holding a hand near the frame or using an infrared thermometer to identify cold spots.
- Confirm latch security by applying outward pressure to ensure it resists forced entry.
Pro Tip: For multi-pane casements, test each sash individually to ensure balanced operation and even pressure distribution across seals.
Interior vs. Exterior Installation: Comparative Structural and Climatic Adaptations
The installation approach for interior and exterior casement windows differs significantly in structural demands and climate adaptations. Below is a comparative analysis of key considerations:
| Factor | Exterior Installation | Interior Installation |
|---|
| Primary Loads | Wind, rain, snow, and thermal expansion. | Sound transmission, drafts, and internal pressure. |
| Anchoring Requirements | Structural anchors (e.g., hurricane ties) and flashing mandatory. | Minimal anchoring (e.g., screws into studs); focus on sealant adhesion. |
| Insulation Needs | Thermal breaks and rigid foam insulation to prevent condensation. | Vapor barriers and acoustic insulation (e.g., mass-loaded vinyl). |
| Weatherproofing | Sealant + backer rod + metal flashing. | Caulking and weatherstripping (e.g., foam or rubber). |
| Climate Adaptations | Low-expansion sealants for freeze-thaw cycles. | Moisture-resistant framing (e.g., fiberglass or aluminum). |
| Operational Testing | Wind-load testing (simulate 110 mph gusts for coastal areas). | Soundproofing tests (decibel reduction measurements). |
Regional Example: In Alaska, exterior casement windows require triple-glazing and reinforced headers to withstand permafrost expansion, while in Florida, impact-resistant glass and hurricane straps are standard.
Functionality Testing Protocols
Post-installation, casement windows must undergo mechanical and environmental testing to validate performance. Key tests include:1. Operational Smoothness:
- Open and close each sash 5–10 times to check for friction, binding, or uneven movement.
- Verify the latch engages securely at 90° and 110° positions (standard casement angles).
- Test balance by opening the window halfway and releasing it; it should stay in place without drifting.
2. Air Leak Detection:
- Use an incense stick or smoke pencil
Advantages and Applications in Architecture
Casement windows represent a versatile and functional solution in both residential and commercial architecture, offering superior ventilation, natural light optimization, and adaptable design flexibility. Their hinged side-opening mechanism enhances airflow efficiency while maintaining structural integrity, making them ideal for climates requiring controlled ventilation without compromising security or energy performance. Architectural styles ranging from traditional to contemporary frequently incorporate casement windows to balance aesthetic appeal with practical benefits, such as improved indoor air quality and reduced reliance on mechanical systems.
Ventilation and Natural Light Optimization
Casement windows excel in maximizing airflow due to their 270° or 360° opening capability, allowing air to circulate freely across the entire window surface. This feature is particularly advantageous in residential settings where cross-ventilation reduces humidity, eliminates stale air, and lowers indoor temperatures passively. In commercial applications, such as offices or retail spaces, casement windows enhance occupant comfort by integrating seamlessly with HVAC systems, reducing energy consumption by up to 25% when paired with proper insulation (U.S. Department of Energy, 2021).Natural light penetration is another key advantage, as casement windows can be positioned to capture sunlight at optimal angles throughout the day. Large, fixed casement panels in modern lofts or minimalist homes amplify spatial perception, while smaller, grid-patterned designs in traditional European architecture preserve historical aesthetics while improving daylight efficiency. The absence of obstructing frames or sashes further enhances light transmission, with some high-performance models achieving visible light transmittance (VLT) ratings exceeding 80%.
Architectural Styles and Aesthetic Integration
Casement windows are prominently featured in architectural movements where functionality aligns with design principles:- Traditional and Tudor Styles: Symmetrical casement windows with divided lites and leaded glass panes are iconic in Tudor and Victorian homes, where their geometric precision complements intricate woodwork. The hinged design allows for secure closure while maintaining a quaint, heritage appearance.
- Modern and Minimalist Designs: Floor-to-ceiling casement windows in steel or aluminum frames dominate contemporary architecture, such as the works of Tadao Ando or Louis Kahn. Their clean lines and unobstructed views create a seamless transition between interior and exterior spaces.
- Brutalist and Industrial Spaces: Heavy-duty casement windows with reinforced frames are common in warehouses or loft conversions, where durability and large opening capacities support ventilation in high-traffic areas.
- Sustainable and Passive House Designs: Triple-glazed casement windows with argon gas fills and low-emissivity coatings are standard in Passive House certifications, where their airtight seals and thermal breaks reduce heat loss by up to 50% compared to conventional windows.
Energy Efficiency and Airflow Dynamics
Casement windows contribute significantly to energy efficiency through their airflow mechanics and insulation properties. When fully opened, they create a "chimney effect," where warm air rises and exits through the top hinge, drawing cooler air inward—a principle utilized in natural ventilation strategies. Combined with multi-pane glazing and warm-edge spacers, modern casement windows achieve U-values as low as 0.8 W/m²K, meeting stringent energy codes in regions like the EU and Canada.
Casement windows optimize energy performance by integrating three key factors:
1. Air Sealing: Weatherstripping around hinges and locks eliminates drafts, reducing infiltration heat loss.
2. Thermal Insulation: Double or triple glazing with inert gas fills (e.g., argon or krypton) minimizes conductive heat transfer.
3. Solar Heat Gain: Low-E coatings and spectrally selective glazing regulate indoor temperatures by blocking UV rays while allowing visible light.
In mixed-climate zones, casement windows can be paired with tilt-turn mechanisms to balance ventilation and security, further enhancing their adaptability. Studies by the National Fenestration Rating Council (NFRC) indicate that properly installed casement windows can improve overall building energy efficiency by 10–15% when combined with strategic shading solutions.
Innovative Applications in Modern Design
Advancements in materials and automation have expanded the functional scope of casement windows in contemporary architecture:- Modular and Prefabricated Systems: Manufacturers like Schüco and Reynaers offer modular casement window units with integrated solar shading and acoustic insulation, ideal for mass housing projects. These systems reduce on-site labor by up to 40% while maintaining customizable designs.
- Smart Automation Integrations: IoT-enabled casement windows, such as those by Lutron or Somfy, allow remote control via smartphone apps, adjusting openings based on indoor CO₂ levels or outdoor air quality. Voice-activated assistants (e.g., Alexa or Google Home) further enhance convenience in smart homes.
- Solar-Powered Ventilation: Hybrid casement windows incorporate small photovoltaic panels to power ventilation fans or automatic actuators, enabling off-grid functionality in remote or eco-conscious buildings.
- Acoustic and Noise Reduction: Laminated glass casement windows with sound-dampening interlayers (e.g., 3–5 mm PVB) are used in urban environments to reduce traffic noise by 30–40 dB without sacrificing light transmission.
In high-rise residential towers, casement windows with pressure-equalized chambers mitigate wind loads, a critical feature for buildings exceeding 20 stories. Similarly, commercial atriums leverage oversized casement panels to create vertical gardens and natural light shafts, reducing artificial lighting costs by up to 60%.
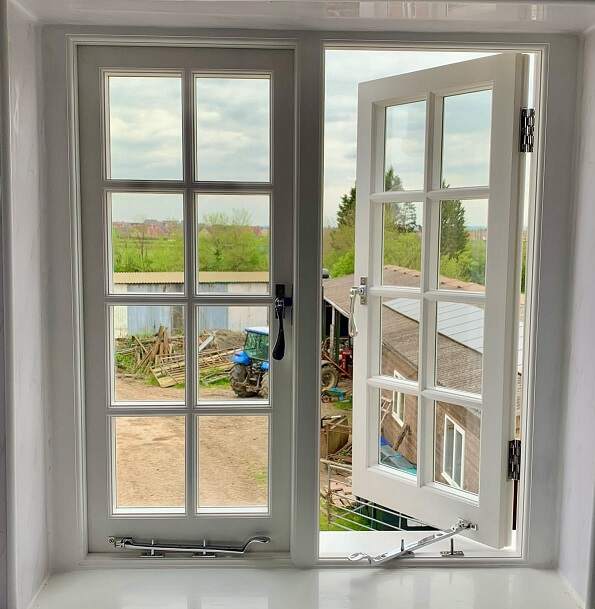
Maintenance, Longevity, and Troubleshooting of Casement Windows
Casement windows are renowned for their durability, energy efficiency, and aesthetic appeal, but their performance depends significantly on proactive maintenance and timely interventions. Proper care extends their operational lifespan, preserves structural integrity, and mitigates common issues such as seal degradation or hinge wear. Climate variations, including humidity, temperature fluctuations, and seasonal exposure, further influence material resilience and functional longevity. This section provides a structured maintenance guide, troubleshooting protocols for frequent malfunctions, and a cost-benefit analysis for repair versus replacement decisions, ensuring optimal performance across diverse environmental conditions.
Comprehensive Maintenance Guide for Casement Windows
Regular maintenance preserves the functionality, energy efficiency, and aesthetic value of casement windows. A systematic approach—comprising cleaning, lubrication, seal inspection, and seasonal adjustments—prevents premature wear and enhances longevity. Below are categorized maintenance tasks based on frequency and criticality, tailored to both residential and commercial applications.
Cleaning Procedures
The accumulation of dirt, pollen, and moisture on window surfaces degrades transparency, reduces thermal performance, and may lead to seal failure. Cleaning should be performed biannually (spring and autumn) or more frequently in high-pollution or coastal environments.- Exterior and Interior Glass Surfaces
Use a pH-neutral glass cleaner or a solution of distilled water and white vinegar (1:1 ratio) to avoid streaks or residue. For stubborn marks, employ a microfiber cloth and isopropyl alcohol (70% concentration). Avoid abrasive materials like steel wool, which can scratch coated glass or frames.
Note: For double-glazed units, ensure no water enters the inter-pane space during cleaning, as condensation or moisture can compromise the insulating gas (e.g., argon) and lead to fogging.
- Frame and Sash Maintenance
Clean frames with a mild soap solution and warm water, followed by a dry microfiber cloth. For wooden frames, use a wood-safe cleaner to prevent warping or discoloration. Metal frames (e.g., aluminum, steel) may require a metal-safe degreaser to remove corrosion or mineral deposits.- Screen and Mesh Cleaning
Remove screens annually and wash with soapy water, then rinse thoroughly. Use a soft-bristle brush for stubborn debris. Replace screens if tears or warping occur, as these compromise ventilation and insect protection.
Lubrication and Mechanical Inspection
Proper lubrication reduces friction in moving parts, preventing sticking hinges or misaligned sashes. Inspect hinges, locks, and multi-point latches quarterly, with additional checks before extreme weather seasons (winter/summer).- Hinge and Pivot Point Lubrication
Apply a silicone-based lubricant or Teflon spray to hinges, pivot points, and crank mechanisms. Avoid petroleum-based products, as they attract dust and may degrade rubber seals. For aluminum or steel frames, use a dry lubricant to prevent corrosion.
Best Practice: Wipe excess lubricant immediately to avoid buildup, which can attract debris and impede smooth operation.
- Lock and Latch Mechanism Maintenance
Test all locking points for smooth engagement. If resistance is detected, disassemble the latch (if accessible) and clean with a fine brush to remove debris. Reapply lubricant to the strike plate and latch pin.
Warning: Never force a stuck latch; disassemble and inspect for obstructions or misalignment before applying lubricant.
- Crank Handle and Gearbox Inspection
Rotate the crank handle through its full range to detect stiffness. If the gearbox (in multi-point locking systems) binds, remove the sash and clean the internal mechanisms with compressed air and a soft brush.
Seasonal Maintenance Checklist
Climate-induced stress accelerates wear in casement windows. Perform the following seasonal checks to mitigate damage:- Spring/Summer Preparation
- Inspect weatherstripping for cracks or compression; replace if degraded.
- Check drainage holes in sashes for blockages (critical in rainy climates).
- Test multi-point locks for proper sealing against wind and rain penetration.
- Apply a UV-resistant sealant to wooden frames if exposed to prolonged sunlight.
- Autumn/Winter Preparation
- Verify thermal break integrity in metal frames to prevent condensation.
- Ensure hinge alignment remains precise; adjust if sashes sag due to temperature contraction.
- Store screens and replace if damaged, as winter storms may dislodge them.
- Insulate exterior frames in cold climates with thermal insulation tape if gaps are detected.
Common Issues and Troubleshooting Solutions
Casement windows exhibit distinct failure modes due to their mechanical complexity and exposure to environmental stressors. Below are systematic troubleshooting steps for prevalent issues, categorized by component and root cause.
Mechanical Failures and Corrective Actions
Mechanical dysfunctions typically stem from wear, misalignment, or improper installation. Address these promptly to avoid secondary damage (e.g., seal failure, frame warping).- Sticking or Seized Hinges -
Symptoms: Sash binds when opening/closing; uneven gaps along the frame.
Causes:
- Accumulation of dirt/debris in hinge pockets.
- Rust or corrosion in metal hinges (common in coastal or humid climates).
- Misaligned hinges due to frame settling or impact.
-
Troubleshooting Steps:
- Remove the sash and clean hinge mechanisms with a soft brush and compressed air.
- Apply anti-seize compound to threaded hinges if corrosion is present.
- Check for hinge alignment; adjust screws incrementally (typically 1/16-inch increments) to realign the sash.
- Replace hinges if threads are stripped or welds are cracked (common in older windows).
-
Prevention: Lubricate hinges biannually and inspect for rust annually in corrosive environments.
Misaligned or Uneven Sashes
Symptoms: Gaps vary along the frame perimeter; sash does not close flush.
Causes:
- Loose or damaged hinges.
- Frame warping (wooden or composite materials).
- Improper installation (e.g., uneven shims).
Troubleshooting Steps:- Disassemble the sash and inspect hinge screws for looseness; tighten incrementally.
- Check for frame distortion using a level tool; replace warped sections if detected.
- Adjust hinge shims (thin metal strips) to compensate for gaps, ensuring even pressure distribution.
- For severe misalignment, consider professional realignment or replacement of the sash.
Prevention: Use pressure-treated wood or stabilized composites in high-humidity areas; install with adjustable shims.
Faulty Locking Mechanisms
Symptoms: Locks fail to engage; sash rattles when closed; visible gaps at latch points.
Causes:
- Debris in latch channels.
- Worn or misaligned strike plates.
- Weak springs in multi-point locks.
Troubleshooting Steps:- Clean latch channels with a vacuum or compressed air to remove dust.
- Check strike plate alignment; adjust screws to ensure flush contact with the latch.
- Replace worn latch pins or springs in multi-point systems.
- Upgrade to high-security locks if tampering or frequent failures occur.
Prevention: Use stainless steel locks in humid climates; test locking mechanisms after storms or extreme temperature shifts.
Compromised seals reduce energy efficiency, increase condensation risk, and may lead to mold growth. Address seal failures systematically to avoid costly replacements.- Condensation Between Glass Panes (Double-Glazed Units) -
Symptoms:
Customization and Accessibility Features in Casement Window Design
Casement windows offer unparalleled versatility in residential, commercial, and institutional architecture due to their hinged design, which enables full rotation for ventilation and cleaning. Beyond standard configurations, these windows can be tailored to meet specialized functional requirements, including safety, accessibility, and energy efficiency. Customization extends to mechanical enhancements—such as motorized operation—and adaptive features that accommodate users with mobility limitations or cognitive needs. Integration with passive solar strategies further refines their performance, aligning with sustainable building practices while maintaining aesthetic cohesion.The adaptability of casement windows ensures they can address diverse architectural and user-centric demands, from childproofing mechanisms to lever-operated handles for elderly accessibility. Below, the focus shifts to practical customization options, accessibility solutions, and their technical implementation, followed by a structured overview of cost and complexity considerations. Additionally, the role of casement windows in passive solar design is explored, highlighting glazing innovations and optimal orientations for energy efficiency.
Customization Options for Functional and Safety Enhancements
Casement windows support a range of modifications to improve usability, security, and maintenance. These adaptations often leverage the window’s hinged mechanism, which allows for innovative solutions not feasible in sliding or fixed windows.Mechanical and Operational Customizations
The hinged design of casement windows enables the integration of specialized mechanisms that enhance convenience and safety. Key examples include:
- Tilt-in cleaning mechanisms: A secondary hinge or latch system permits the sash to tilt inward at a 15°–30° angle, facilitating interior cleaning without external ladders or tools. This feature is particularly valuable in multi-story buildings or where exterior access is restricted.
- Child safety locks: Magnetic or latch-based locking systems prevent unintended opening, aligning with safety standards such as ASTM F2090 for residential windows. These locks can be installed at the top or side of the sash and are often combined with limited-opening stops to restrict full rotation.
- Multi-point locking systems: Enhanced security is achieved through multiple locking points along the frame, reducing vulnerability to forced entry. These systems are common in commercial or high-risk residential applications.
- Motorized operation: Electric actuators enable remote or voice-controlled opening/closing, ideal for smart home integration or users with limited mobility. Motors can be integrated into the hinge mechanism or mounted externally, with power sources ranging from battery-operated to hardwired.
Aesthetic and Material Customizations
Beyond mechanical adaptations, casement windows accommodate aesthetic and material variations to suit architectural styles or client preferences:
- Frame finishes: Powder-coated, anodized, or wood-grain vinyl finishes provide durability and design flexibility. Custom colors and textures can align with interior/exterior palettes.
- Glazing patterns: Obscured, frosted, or patterned glass options enhance privacy without compromising ventilation. Decorative grids or etched designs are often used in historic or luxury projects.
- Hardware finishes: Brushed nickel, matte black, or bronze handles complement both modern and traditional aesthetics while ensuring corrosion resistance.
Adaptive Designs for Accessibility in Casement Windows
Accessibility features in casement windows prioritize ease of operation, reduced physical effort, and compliance with standards such as the Americans with Disabilities Act (ADA) and EN 12608 (European accessibility guidelines). The hinged design naturally lends itself to adaptations that minimize manual force, such as lever handles and wider openings.Key Accessibility Enhancements
The following modifications address common mobility challenges while maintaining the window’s structural integrity and performance: - Lever handles instead of knobs: Replaces traditional cranks or knobs with ergonomic levers, reducing the grip strength required by up to 70%. Levers are mandatory in ADA-compliant designs and are often paired with low-effort hinges that reduce opening force to ≤5 lbs (2.3 kg).
- Wider sash openings: Customized hinge mechanisms allow sashes to open up to 90°–110°, creating unobstructed passageways for wheelchair users or individuals with limited reach. Some systems incorporate gas struts to assist in holding the sash open.
- Motorized or push-button operation: Electric actuators or push-to-open mechanisms eliminate the need for manual force. These systems can be integrated with building automation for centralized control.
- Voice-activated controls: Smart home compatibility extends to voice commands (e.g., via Alexa or Google Assistant), enabling hands-free operation for users with dexterity limitations.
- Lowered hardware placement: Handles and locks are positioned at 34–48 inches (86–122 cm) above the floor, aligning with ADA reach-range standards for seated users.
Adaptive Frame and Glazing Solutions
For users with visual impairments or cognitive disabilities, additional adaptations improve safety and usability:
- Tactile indicators: Raised dots or Braille labels on handles or locks provide visual cues for operation.
- Contrast finishes: High-contrast frames (e.g., black on white) or colored glazing edges improve visibility.
- Shatter-resistant glazing: Laminated or tempered glass reduces injury risk from broken fragments, a critical feature in accessible environments.
Customization and Accessibility Features Comparison Table
The following table summarizes common customization types, their purposes, installation complexity, and associated cost impacts. Costs are approximate and vary based on material, labor, and regional market conditions (USD, 2023 estimates).
| Customization Type |
Purpose |
Installation Complexity |
Cost Impact |
|---|
| Tilt-in cleaning mechanism |
Enables interior cleaning without external tools; reduces fall risks. |
Moderate (requires secondary hinge or latch system; may need frame modifications). |
$150–$400 per window (additional $50–$150 for high-end systems). |
| Child safety locks (magnetic or latch-based) |
Prevents unintended opening; complies with safety standards. |
Low (retrofit kits available; minimal frame alteration). |
$30–$120 per lock (bulk discounts reduce per-unit cost). |
| Multi-point locking system |
Enhances security with multiple locking points; deterrent for forced entry. |
High (requires precise alignment; may need reinforced frames). |
$200–$600 per window (premium systems cost more). |
| Motorized operation (electric actuator) |
Remote or voice-controlled opening; assists users with mobility limitations. |
High (wiring, motor integration, and smart home compatibility testing). |
$500–$1,500 per window (hardwired systems are pricier than battery-operated). |
| Lever handles (ADA-compliant) |
Reduces grip strength requirement; meets accessibility standards. |
Low (direct replacement for existing hardware). |
$20–$80 per handle (stainless steel or brushed finishes add cost). |
| Wider sash opening (90°–110°) |
Creates unobstructed passage for wheelchair users; improves ventilation. |
Moderate (hinge adjustments or custom mechanisms may be needed). |
$100–$300 per window (gas struts add $50–$150). |
| Push-button or voice-activated operation |
Hands-free control; integrates with smart home ecosystems. |
High (requires automation system setup and compatibility testing). |
$400–$1,200 per window (depends on smart home platform). |
| Lowered hardware placement (ADA-compliant) |
Accommodates seated users; aligns with reach-range standards. |
Low (adjustable hardware or repositioning during installation). |
$10–$50 per adjustment (minimal material cost). |
| Tactile indicators (Braille/raised dots) |
Assists visually impaired users in identifying handles/locks. |
Low (ap From their hinged mechanisms and weatherproofing innovations to customizable accessibility features and energy-efficient adaptations, casement windows exemplify the fusion of form and function in modern architecture. Their ability to balance ventilation, insulation, and structural stability—while accommodating diverse climatic and design requirements—makes them indispensable in contemporary building practices. By integrating smart automation, passive solar strategies, or adaptive accessibility solutions, these windows transcend traditional roles to become dynamic elements in sustainable and user-centric spaces. As architectural demands evolve, casement windows remain a testament to how thoughtful design can elevate both performance and livability.
FAQ
What exactly are casement windows, and how are they commonly used in homes in the UK?
Casement windows are hinged on one side (usually the side or top) and open outward via a crank handle. In the UK, they’re popular for their energy efficiency, security, and ability to maximize ventilation. They’re often installed in bedrooms, bathrooms, or as fixed upper panes paired with sliding sashes.
What purposes do casement windows serve in residential and commercial buildings?
Casement windows are primarily used for ventilation, natural light, and security. Their outward-opening design allows for better airflow and easier cleaning (no need to climb onto sills). They’re also durable and can be fitted with locks, making them ideal for ground-floor or high-security areas.
What advantages do casement windows offer compared to other window types?
Casement windows excel in energy efficiency due to tight seals when closed, and they provide unobstructed views when open. They’re easier to clean than sliding windows and can be customized with multiple panes or grid designs. Their outward swing also allows for larger glass areas without sacrificing security.
How do casement windows differ from double-hung windows in terms of function and design?
Casement windows hinge on one side and open outward, while double-hung windows have two movable sashes that slide vertically. Casements offer better ventilation and security but require outdoor space to open; double-hungs are easier to clean from inside but may have weaker seals. Casements are often preferred for modern homes, while double-hungs suit traditional styles.
What are flush casement windows, and how do they differ from standard casement windows?
Flush casement windows have hinges embedded within the frame, creating a seamless, modern look with no visible hardware. Unlike standard casements, which may have external hinges or visible cranks, flush designs offer a cleaner aesthetic and can be installed in tight spaces. They’re commonly used in contemporary or minimalist architecture.
What defines a casement-style window, and how does it differ from other window styles?
A casement-style window is characterized by its side or top hinges and outward-opening mechanism, typically operated by a crank handle. Unlike sliding windows (which move horizontally) or awning windows (hinged at the top but opening outward), casements provide maximum airflow and can be paired with fixed lights for versatility. Their design prioritizes ventilation and security over ease of interior access.
|
|
:max_bytes(150000):strip_icc()/Casementwindows-GettyImages-97897881-87b27b53e6114bbb98a85ba811bdecd7.jpg)
Leave a Comment
Comments are moderated before appearing. The data you submit is processed according to the Privacy Policy of Voltefac.