| Joiner |
Specializes in fine woodworking, often custom furniture, paneling, and intricate joinery for interior spaces. |
Hand tools (e.g., hand saws, chisels), woodworking planes, clamps, and high-precision measuring devices. |
- Custom cabinetry and built-ins.
- Historical restoration (e.g., period furniture).
- Decorative woodwork (e.g., parquet floors, inlays).
Types of Carpenters and Specializations
Carpentry encompasses a diverse range of specializations, each tailored to specific construction phases, materials, or aesthetic requirements. These roles evolve from foundational general carpentry skills into highly technical disciplines, often dictated by project scale, precision demands, or industry trends. Specializations may overlap, but distinct techniques, tools, and material expertise define each category. Below, the progression from general carpentry to advanced specializations is categorized, alongside emerging roles reflecting modern industry shifts.
Categorization of Carpenter Specializations
Carpenter specializations are typically grouped by project phase (e.g., structural vs. finish work), material focus (e.g., wood vs. composite), or application niche (e.g., residential vs. industrial). The following table outlines key categories, their core techniques, and representative projects, structured by functional hierarchy:
| Specialization |
Core Techniques |
Common Projects |
Tools/Materials |
|---|
| Rough Carpentry |
- Framing systems (platform, balloon, post-and-beam) with engineered lumber or dimensional wood.
- Installation of load-bearing walls, floors, and roof trusses using power tools (e.g., nail guns, circular saws).
- Precision cutting for structural integrity, adhering to building codes (e.g., IRC, OSHA safety standards).
|
- Residential/light commercial framing.
- Renovations requiring structural modifications.
- Sheds, garages, and agricultural buildings.
|
- Materials: Pressure-treated lumber, I-joists, steel beams.
- Tools: Miter saws, framing nails, laser levels.
|
| Finish Carpentry |
- Custom joinery (e.g., dovetails, finger joints) for aesthetics and durability.
- Installation of trim (baseboards, crown molding), cabinetry, and built-ins using hand tools (e.g., chisels, planes) and precision measuring.
- Surface finishing (sanding, staining, varnishing) to match design specifications.
|
- Interior/exterior residential trim work.
- Custom cabinetry and bookshelves.
- Historical restoration projects.
|
- Materials: Hardwoods (oak, maple), MDF, plywood.
- Tools: Hand planes, routers, brushes for finishes.
|
| Architectural Millwork |
- Fabrication of complex wood components (e.g., staircases, railings, cornices) using CAD/CAM software.
- Integration of wood with other materials (e.g., glass, metal) for structural and decorative cohesion.
- Adherence to architectural drawings with tight tolerances (≤1/16" variance).
|
- High-end residential and commercial interiors.
- Museum exhibits and heritage buildings.
- Custom furniture for hospitality (hotels, yachts).
|
- Materials: Exotic woods (walnut, mahogany), composites, engineered wood.
- Tools: CNC routers, laser cutters, epoxy resins.
|
| Shipbuilding and Marine Carpentry |
- Construction and repair of wooden vessels using waterproof adhesives and marine-grade sealants.
- Specialized joinery (e.g., scarf joints, edge-gluing) to withstand moisture and stress.
- Installation of decking, bulkheads, and rigging systems with corrosion-resistant hardware.
|
- Traditional sailboats and modern yachts.
- Pier and dock construction.
- Repairs for commercial fishing vessels.
|
- Materials: Teak, mahogany, fiberglass-reinforced wood.
- Tools: Adhesive injectors, marine-grade fasteners, chisels for curved cuts.
|
| Stage and Set Construction |
- Rapid assembly/disassembly of temporary structures (e.g., flats, scaffolding) using lightweight yet durable materials.
- Integration of lighting rigs, soundproofing, and special effects (e.g., trapdoors, rotating stages).
- Collaboration with theater technicians to meet production deadlines.
|
- Broadway/West End sets.
- Film/TV backlots and concert stages.
- Corporate event builds.
|
- Materials: Plywood, MDF, aluminum trusses, lightweight composites.
- Tools: Portable power tools, modular clamping systems, safety harnesses.
|
Progression from General Carpenter to Specialized Roles
The pathway from general carpentry to specialization follows a skills-based hierarchy, where foundational knowledge in structural integrity, material properties, and tool proficiency enables advancement. Below is a flowchart-style progression, illustrating how experience and education (e.g., apprenticeships, certifications) lead to niche roles:
Core Progression Pathway:
General Carpenter → Phase-Specific Roles (Rough/Finish) → Material/Niche Specialization → Advanced Technical Roles
1. Entry-Level Foundations
- Mastery of basic framing, measuring, and tool operation (e.g., hammer, tape measure, speed square).
- Completion of 1–3 years of apprenticeship (e.g., through unions like the United Brotherhood of Carpenters).
- Example: A rough carpenter gains experience in residential framing before transitioning to custom work.
2. Phase Specialization
- Rough Carpentry: Focus on structural systems (e.g., platform framing for multi-story buildings).
- Finish Carpentry: Emphasis on aesthetics and precision (e.g., installing wainscoting in historic homes).
- Certification Path: OSHA 10/30 for safety, or LEED Green Associate for sustainable practices.
3. Material/Niche Focus
- Wood Species Expertise: Transition to working with exotic or reclaimed wood (e.g., for architectural millwork).
- Composite/Engineered Materials: Training in synthetic wood products (e.g., LVL beams, bamboo flooring).
- Example: A finish carpenter specializing in trim may shift to historical restoration, learning period-specific techniques (e.g., period-appropriate joinery for 18th-century homes).
4. Advanced Technical Roles
- CAD/CAM Integration: Use of software (e.g., SketchUp, AutoCAD) for custom fabrication in millwork or stage sets.
- Project Management: Overseeing crews for large-scale projects (e.g., commercial developments, cruise ship interiors).
- Education Bridge: Associate degrees in drafting or construction management to complement hands-on skills.
Emerging and Niche Specializations
Innovations in sustainability, technology, and preservation have spawned specialized roles addressing modern challenges. These niches often require cross-disciplinary knowledge, blending traditional craftsmanship with scientific or digital tools.
| Specialization |
Tools and Equipment Essentials in Carpentry
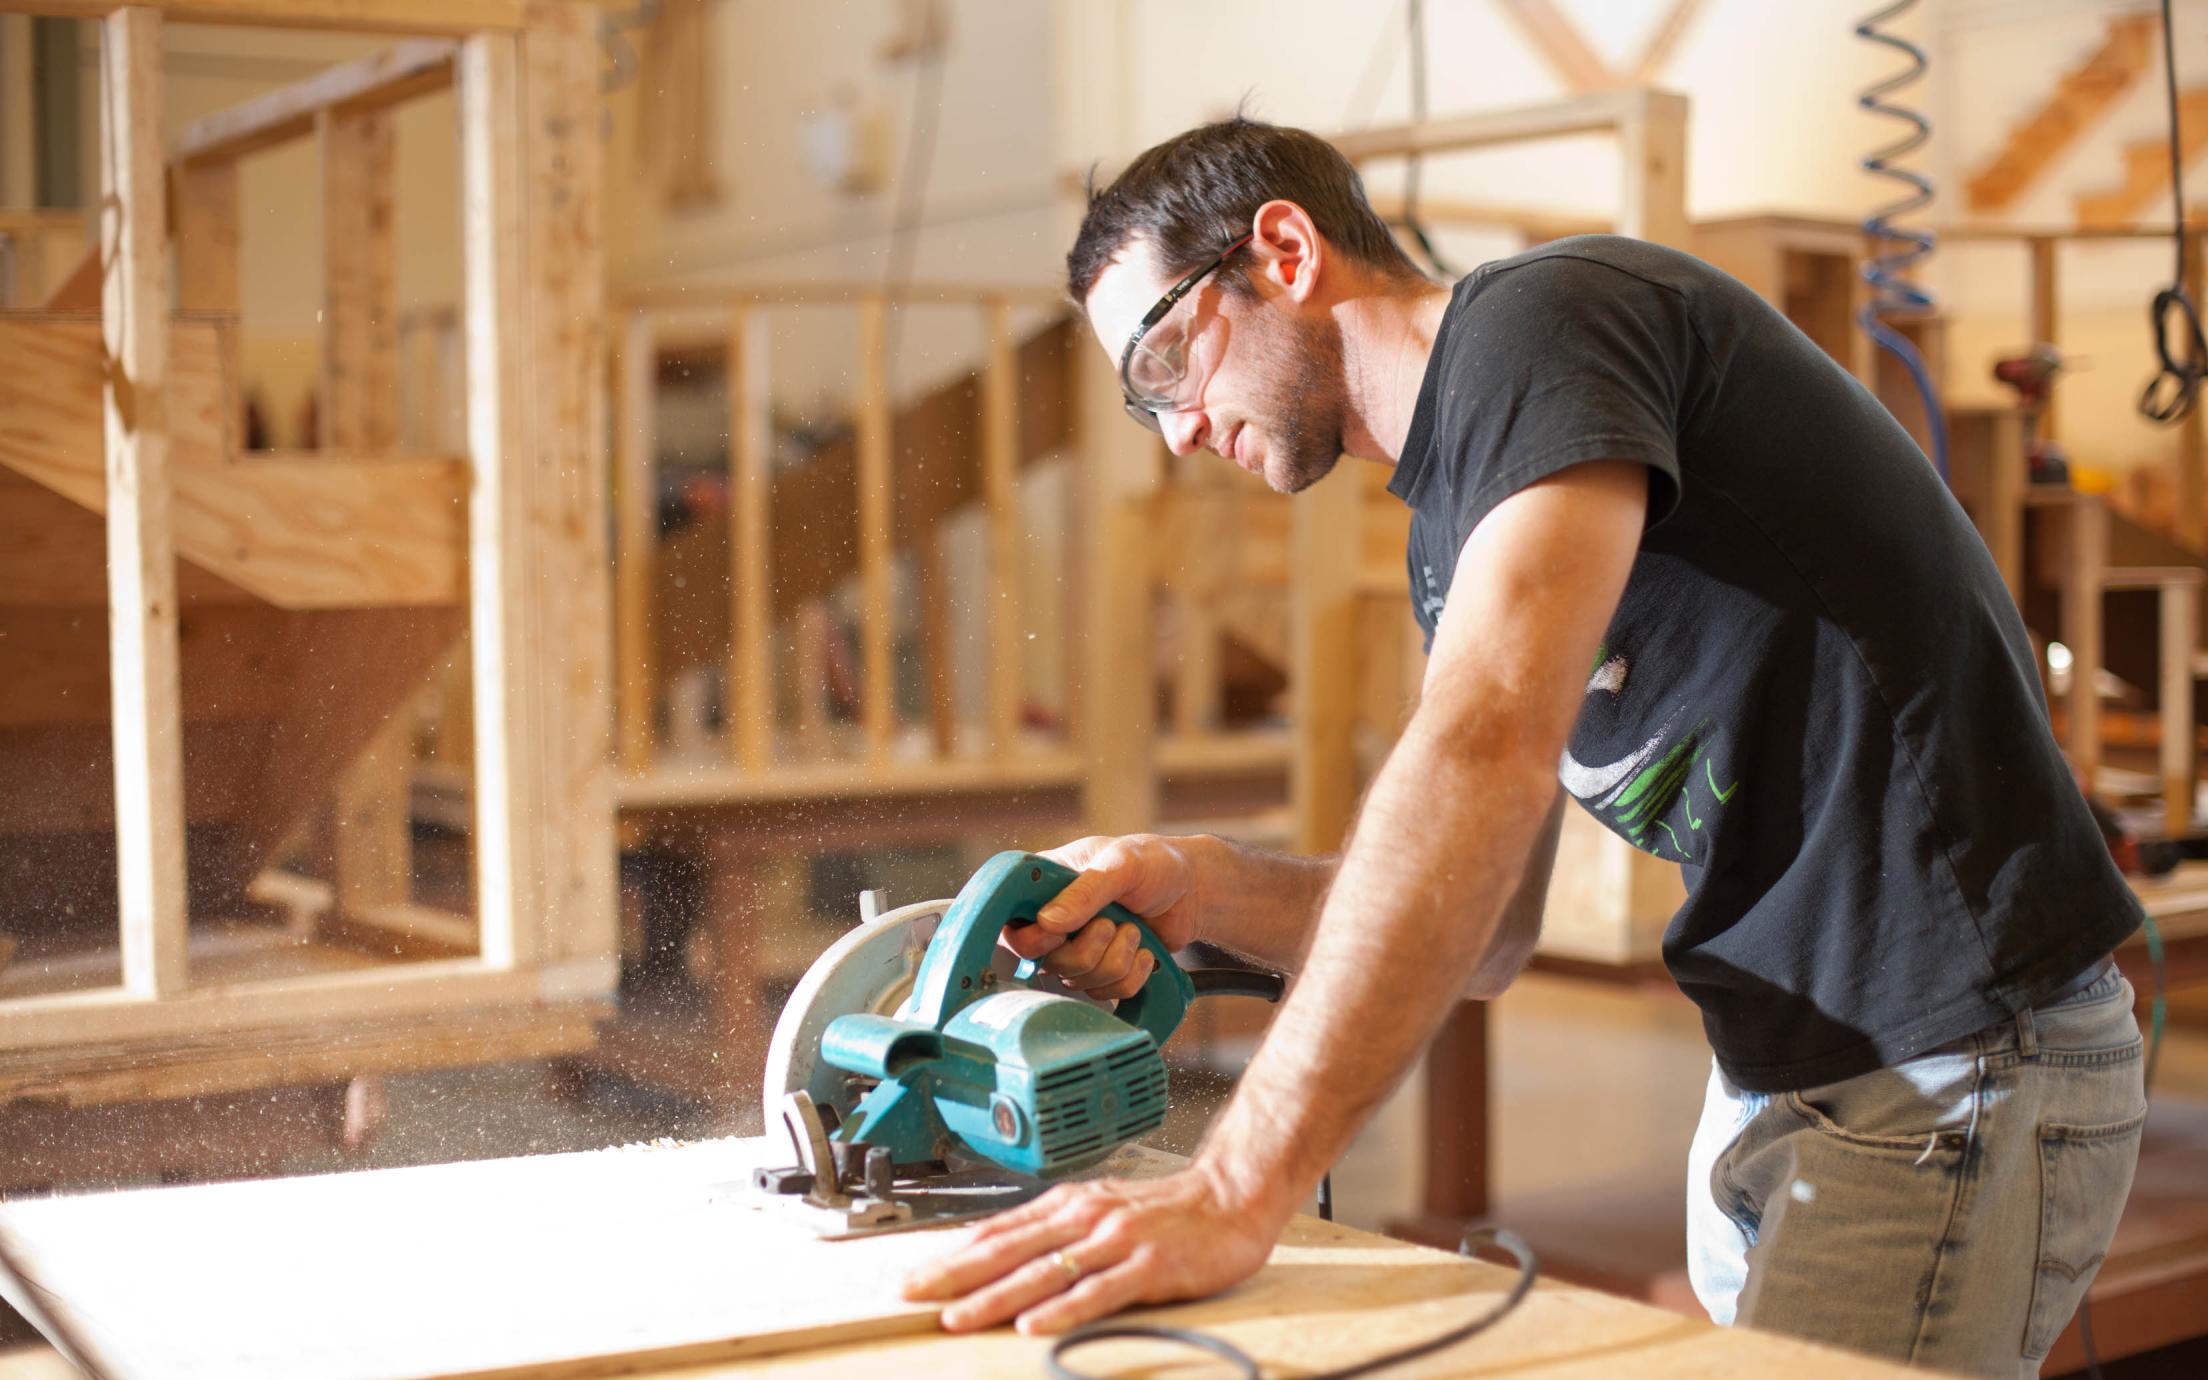
Carpentry relies on a precise and diverse array of tools, ranging from fundamental hand tools to advanced power equipment, each serving a specialized purpose in craftsmanship, precision, and efficiency. The selection of tools often depends on the project scale, material type, and desired finish quality. Hand tools remain indispensable for fine detailing and traditional techniques, while power tools accelerate production and enable complex cuts. Proper maintenance and storage extend tool lifespan, ensuring reliability and safety. Below is a structured breakdown of essential tools, their applications, and best practices for upkeep.
Comprehensive Inventory of Carpentry Tools
Hand Tools
Hand tools form the backbone of carpentry, offering control and precision for tasks requiring finesse. Their design prioritizes durability and ergonomics, often crafted from high-carbon steel or hardened alloys to withstand repetitive use.
| Tool Name |
Primary Use |
Safety Considerations |
|---|
| Chisels (Bench, Firmer, Gouge) |
Paring wood, carving details, cleaning joints, and shaping edges. Bench chisels (1/4"–1") are versatile for general work, while firmer chisels (3/8"–2") handle heavier cuts. Gouges create curved surfaces in joinery or decorative work. |
- Wear safety glasses to prevent wood chip injuries.
- Use a mallet with a wooden or rubber face to avoid damaging the chisel’s edge.
- Secure the workpiece with clamps or a vise to prevent slippage.
- Store chisels in a padded case or magnetic strip to prevent edge damage.
|
| Hand Planes (Jack, Block, Smoothing, Fore) |
Shaping and smoothing wood surfaces. Jack planes (10–14") remove material quickly, block planes (7–9") refine edges, smoothing planes (6–8") achieve fine finishes, and fore planes (16–20") level rough stock. |
- Adjust the blade height incrementally to avoid aggressive cuts that may cause tear-out.
- Wear gloves to protect hands from splinters during rough planing.
- Clean the mouth of the plane frequently to remove debris and prevent clogging.
- Store planes horizontally with the blade facing upward to prevent warping.
|
| Hammers (Claw, Ball-Peen, Mallet) |
Driving nails, pulling nails (claw hammer), shaping metal (ball-peen), or striking chisels without marring (mallet). Claw hammers (16–24 oz) are standard for framing, while mallets (wooden or rubber) protect delicate surfaces. |
- Use the proper hammer weight for the task to avoid misfires or hand fatigue.
- Keep fingers clear of the nail head to prevent crushing injuries.
- Inspect hammer heads for cracks or loose nails before use.
- Store hammers head-down in a pegboard or toolbox to maintain balance.
|
| Saws (Hand Saw, Coping Saw, Japanese Pull Saw) |
Cutting wood along straight or curved lines. Standard hand saws (10–14 TPI) rip or crosscut lumber, coping saws (14–18 TPI) handle intricate curves, and Japanese pull saws (ryoba or dozuki) offer precision for joinery with minimal kerf. |
- Support the workpiece on sawhorses or a stable surface to prevent kickback.
- Use push strokes for hand saws to maintain control; pull strokes for Japanese saws to leverage their design.
- Replace blades with dull or damaged teeth to avoid binding.
- Store saws in a dry environment to prevent rust; use blade guards if available.
|
| Measuring and Marking Tools (Tape Measure, Combination Square, Marking Gauge) |
Accurate measurements and layout. Tape measures (16’–35’) provide linear dimensions, combination squares (L-square, try square) ensure right angles and flat surfaces, and marking gauges transfer precise lines parallel to edges. |
- Lock tape measures to prevent retraction injuries; use a hook for pulling.
- Check square blades for accuracy periodically using a known reference.
- Avoid over-tightening marking gauge pins to prevent stripping wood fibers.
- Store measuring tools in a case with padded compartments to avoid bending.
|
Power Tools
Power tools enhance productivity by automating repetitive tasks and enabling complex operations. Modern advancements, such as laser-guided systems and brushless motors, improve precision and reduce user fatigue.
| Tool Name |
Primary Use |
Safety Considerations |
|---|
| Circular Saw |
Ripping and crosscutting lumber, plywood, or sheet goods. Blade diameter (7–12") and arbor size determine cut depth and material compatibility. |
- Use a guide rail or straightedge for accurate cuts; never freehand without support.
- Wear hearing protection and safety glasses; debris can eject at high speeds.
- Unplug the tool before changing blades; ensure the blade is compatible with the arbor.
- Store blades in a dry, magnetic holder to prevent corrosion.
|
| Miter Saw |
Precision angled cuts (miter and bevel) for framing, trim, and joinery. Sliding compound miter saws accommodate wider materials. |
- Secure the workpiece with clamps or a fence to prevent movement during cuts.
- Adjust the blade height and angle before powering on to avoid binding.
- Use push sticks for narrow cuts to keep fingers clear of the blade.
- Clean the saw table and blade frequently to remove sawdust buildup.
|
| Router |
Shaping edges, creating decorative profiles (e.g., ogee, chamfer), and hollowing out mortises. Fixed-base routers offer stability; plunge routers allow depth adjustment mid-cut. |
- Use a guide bushing or template for consistent cuts; avoid freehand routing on end grain.
- Wear a dust mask and goggles; fine wood particles are hazardous.
- Test the router on scrap material before final cuts to confirm settings.
- Store router bits in a bit organizer with protective caps to prevent damage.
|
| Nail Gun (Framing, Finish, Brad) |
Driving nails for framing (heavy-duty coils), trim (smaller nails), or finishing (brads for clean surfaces). Pneumatic nail guns require an air compressor; cordless models use lithium-ion batteries. |
- Keep fingers and body parts clear of the nail path; the trigger should only activate when the nosepiece contacts the workpiece.
- Inspect the magazine for bent or missing nails before use.
- Use safety glasses and hearing protection; nail guns emit loud noise.
- Store nail guns with the magazine removed to prevent accidental firing.
|
| CNC Router |
Automated cutting, carving, and milling of complex 2D/3D designs from CAD/CAM files
Materials and Work Processes in Carpentry
Carpentry relies on a diverse range of materials, each selected for its structural integrity, aesthetic appeal, and suitability for specific applications. The choice of material directly influences durability, cost-efficiency, and sustainability in construction projects. Understanding their properties—such as grain pattern, moisture resistance, and workability—enables carpenters to optimize performance while adhering to project requirements. Additionally, modern carpentry increasingly incorporates sustainable alternatives to reduce environmental impact without compromising quality.The selection of materials and the execution of work processes determine the success of a carpentry project. Below, the properties and applications of common materials are outlined, followed by a structured breakdown of constructing a basic wooden structure. Sustainable alternatives are also examined for their role in contemporary practices.
Common Carpentry Materials and Their Properties
The performance of carpentry materials varies based on factors such as hardness, dimensional stability, and resistance to decay or insects. Below is a comparative table summarizing key characteristics of widely used materials, including softwoods, hardwoods, engineered wood products, and composites.
| Material Type |
Durability (Lifespan Under Ideal Conditions) |
Cost (Relative to Softwoods) |
Best Applications |
|---|
| Pine (Softwood) |
Moderate (15–30 years untreated; 50+ years with preservative treatment) |
Low |
Interior framing, furniture, cabinetry, decks (when treated), and temporary structures. Lightweight and easy to work with, but prone to warping if not properly dried. |
| Oak (Hardwood) |
High (50–100+ years untreated; resistant to wear and moisture) |
High |
Flooring, high-end furniture, structural beams, and exterior applications like doors and trim. Dense grain provides excellent strength and durability. |
| Plywood (Engineered Wood) |
Moderate to High (20–50 years depending on veneer and adhesive type) |
Moderate |
Sheathing, subflooring, cabinetry, and paneling. Resistant to warping due to cross-laminated layers, but edge-gluing is required for moisture resistance. |
| Oriented Strand Board (OSB) |
Moderate (15–30 years for exterior use; prone to swelling if exposed to moisture) |
Low |
Structural sheathing, roofing, and temporary forms. Cost-effective but less stable than plywood in humid conditions. |
| Engineered Wood (e.g., LVL, I-Joists) |
High (50+ years with proper treatment) |
Moderate to High |
Framing for large spans (e.g., beams, headers), where dimensional stability and load-bearing capacity are critical. Resistant to splitting and warping. |
| Composite Lumber (e.g., Trex, Fiberon) |
Very High (25–50+ years with minimal maintenance) |
High |
Exterior decks, railings, and siding. Resistant to rot, insects, and weathering but may lack the natural aesthetic of wood. |
Key Considerations for Material Selection:
- Moisture Exposure: Materials like cedar or redwood are naturally resistant to rot, making them ideal for outdoor projects, whereas pine requires preservative treatment.
- Structural Requirements: Hardwoods and engineered woods (e.g., LVL beams) are preferred for load-bearing applications due to their strength-to-weight ratio.
- Aesthetic Preferences: Visible surfaces (e.g., furniture, trim) often use hardwoods or high-quality plywood for their grain patterns and finishability.
- Budget Constraints: Engineered woods and OSB offer cost-effective alternatives to solid wood while maintaining structural integrity.
Step-by-Step Construction of a Basic Wooden Structure: Deck Frame
Constructing a deck frame involves precise planning, material preparation, and sequential assembly to ensure stability and longevity. Below is a structured process with critical stages highlighted, along with common pitfalls to avoid.Preparation and Planning:
Before beginning construction, verify local building codes for deck requirements, including footing depth, rail height, and load-bearing specifications. Sketch a layout with measurements for joist spacing (typically 16 or 24 inches on-center) and cut lists for materials. Ensure all lumber is kiln-dried to prevent future warping. Critical Stages in Deck Frame Construction:
Stage 1: Footings and Ledger Board Installation
- Excavate holes for footings (minimum 12 inches below frost line) and set concrete forms.
- Use pressure-treated lumber (e.g., 2x6 or 2x8) for the ledger board, securing it to the house with through-bolts and a flashing tape to prevent water intrusion.
- Pitfall: Improper footing depth or ledger attachment can lead to structural failure during seasonal expansion/contraction.
Stage 2: Framing the Deck Frame
- Install rim joists (2x8 or 2x10) at the perimeter using galvanized joist hangers.
- Lay out and secure joists (typically 2x8 or 2x10) perpendicular to the ledger, ensuring they are level and spaced consistently.
- Pitfall: Uneven joist spacing or failure to account for overhang (typically 1–2 feet) can result in an unstable frame.
Stage 3: Adding Beams and Blocking (If Required)
- For decks wider than 8 feet, add a center beam (e.g., 2x12 or engineered beam) to support joists and prevent sagging.
- Install blocking between joists at mid-span to enhance rigidity, especially for cantilevered sections.
- Pitfall: Skipping blocking in wide spans may cause joists to bow over time under load.
Stage 4: Fastening and Inspection
- Use exterior-grade screws or nails (e.g., ring-shank or deck screws) for all connections to resist corrosion.
- Double-check for square corners (90-degree angles) and verify that all components are plumb and level.
- Pitfall: Using improper fasteners (e.g., common nails) can lead to loosening and structural compromise.
Post-Construction Considerations:
- Apply a waterproof sealant to all cut ends of lumber to prevent moisture absorption.
- Install temporary bracing during curing to avoid shifting until decking boards are added.
Sustainable and Alternative Materials in Modern Carpentry
The carpentry industry is increasingly adopting sustainable materials to reduce deforestation, lower carbon footprints, and minimize waste. These alternatives often replicate the performance of traditional wood while offering unique properties, such as faster regrowth cycles or recycled content.Common Sustainable Materials and Their Applications:
Reclaimed Wood:
- Sourced from old buildings, barns, or pallets, reclaimed wood retains original character (e.g., nail holes, grain patterns) and avoids contributing to new deforestation.
- Applications: Flooring, paneling, furniture, and accent beams. Requires sanding and sealing to address potential issues like hidden nails or chemical treatments.
- Advantages: Low environmental impact, high durability (often pre-seasoned), and unique aesthetic appeal.
Bamboo:
- A fast-growing grass (not a wood) that regenerates within 5–7 years, making it one of the most sustainable alternatives.
- Applications: Flooring, cabinetry, and structural framing (when treated for moisture resistance). Harder than many hardwoods but prone to splintering if not properly finished.
- Advantages: High strength-to-weight ratio, carbon-negative growth cycle, and antimicrobial properties.
- Considerations: Untreated bamboo may absorb moisture; requires sealing or modification for exterior use.
Composite and Engineered Wood Products:
- Examples: Composite lumber (e.g., Trex, TimberTech), strawboard, or hempcrete (for insulation).
- Applications: Decking, siding, and non-structural panels. Composites combine wood fibers with recycled plastics for enhanced durability.
- Advantages: Resistant to rot, insects, and warping;
Safety Protocols and Workplace Standards in Carpentry
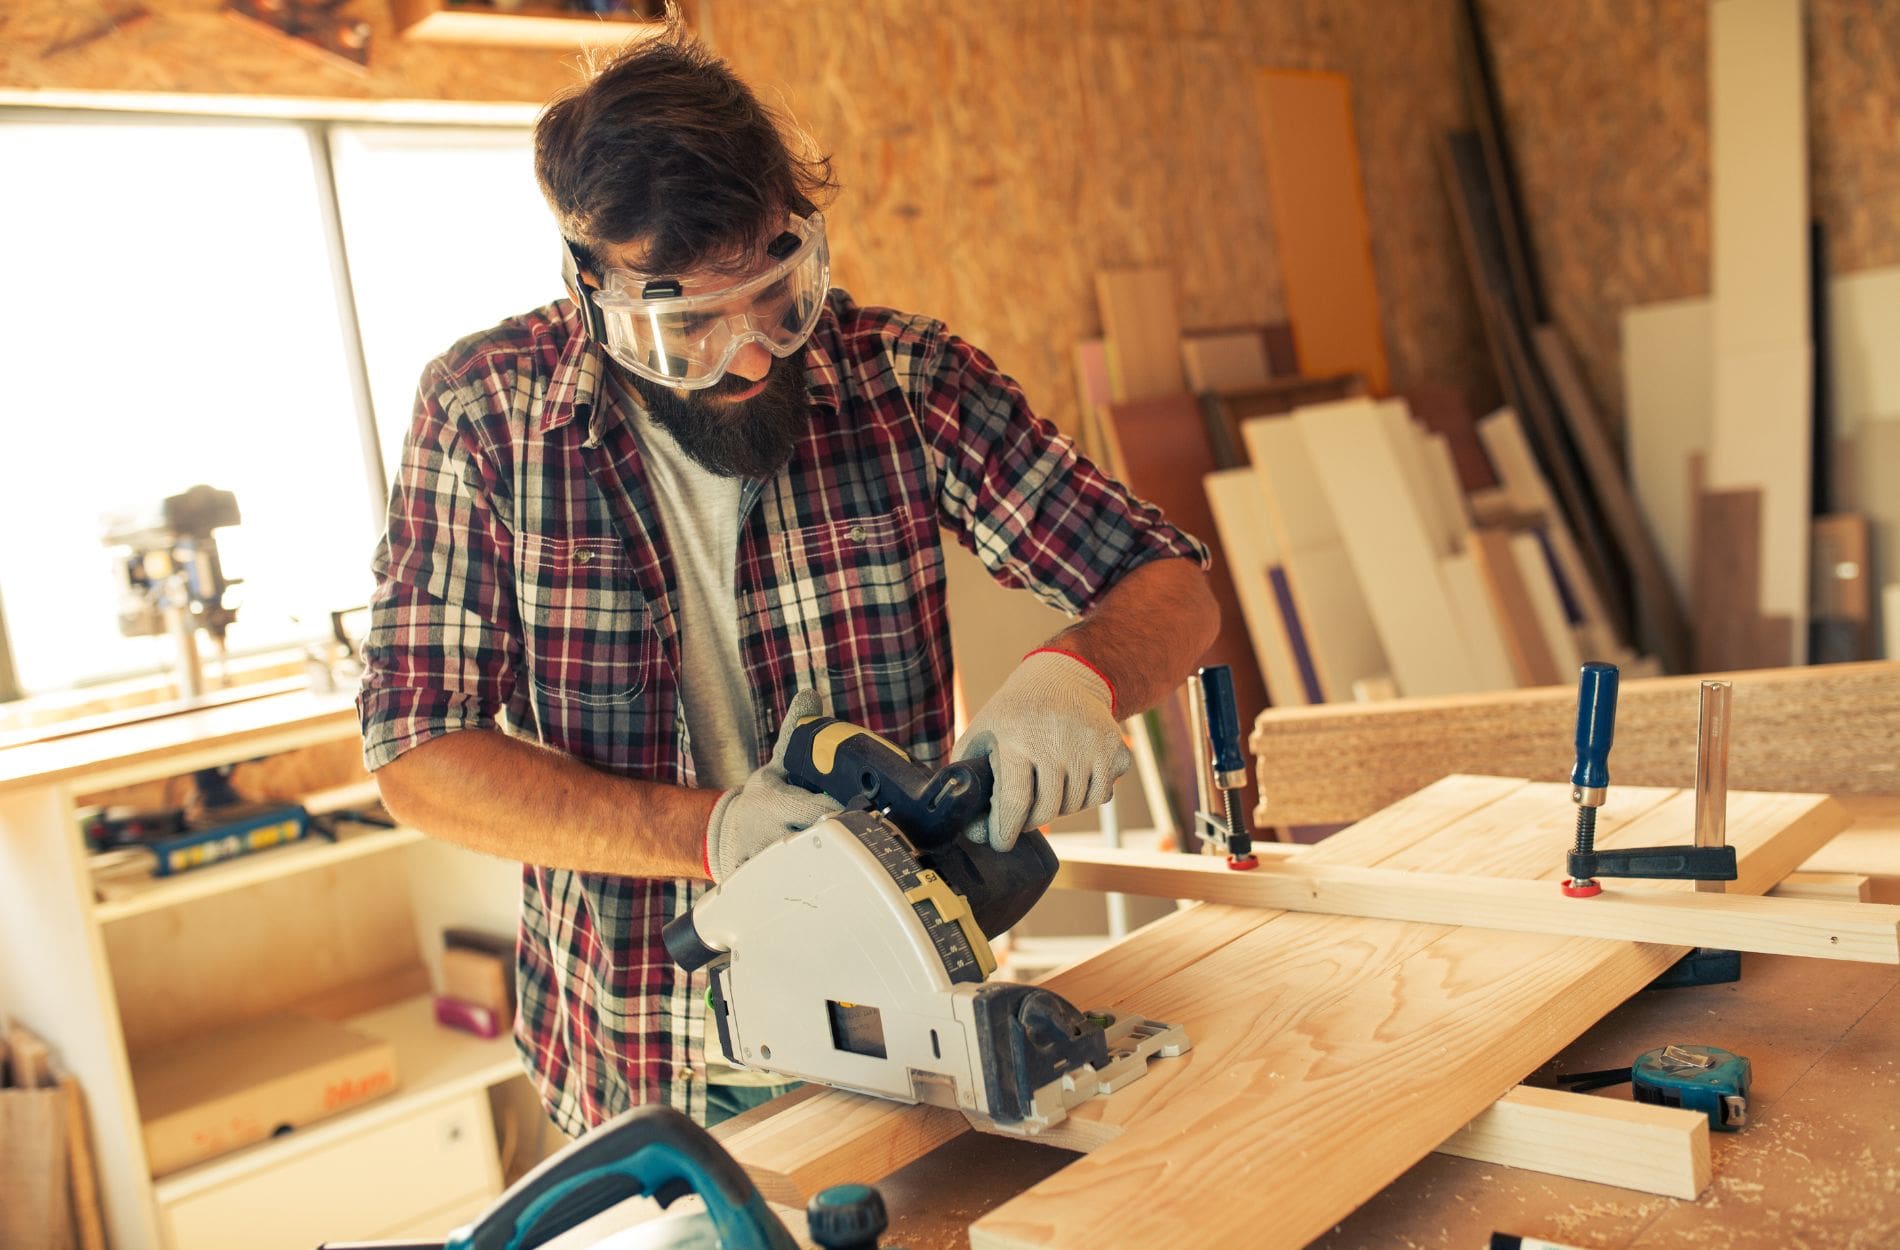
Carpentry involves working with sharp tools, heavy materials, and elevated surfaces, making adherence to safety protocols essential to prevent injuries and ensure compliance with regulatory standards. The Occupational Safety and Health Administration (OSHA) and industry-specific guidelines mandate protective measures to mitigate risks such as falls, cuts, and repetitive strain injuries. Below are structured frameworks for mandatory safety gear, hazard risk assessments, and ergonomic best practices tailored to carpentry professionals.
Mandatory Safety Gear and OSHA/Industry Compliance
Personal protective equipment (PPE) is non-negotiable in carpentry to safeguard against physical hazards. The following table outlines essential safety gear, its purpose, and compliance requirements based on OSHA standards (29 CFR 1910.132–138) and industry best practices.
| Gear Type |
Purpose |
OSHA/Industry Standards |
|---|
| Hard Hats (Type I or II) |
Protects against falling objects, electrical hazards, and head injuries in construction zones. |
OSHA 1910.135: Required in areas with overhead hazards (e.g., scaffolding, demolition). ANSI Z89.1 compliance. |
| Safety Glasses or Goggles |
Shields eyes from wood chips, dust, and debris during cutting, sanding, or nailing. |
OSHA 1910.133: Mandatory when operating power tools or handling materials that may produce projectiles. |
| Hearing Protection (Earplugs or Earmuffs) |
Reduces exposure to noise levels exceeding 85 dB, common with power tools (e.g., table saws, nail guns). |
OSHA 1910.95: Hearing conservation program required for noise exposure ≥85 dB over 8-hour shifts. NIOSH-approved devices recommended. |
| Cut-Resistant Gloves |
Prevents lacerations from sharp edges, nails, or splinters; often made of leather or synthetic materials. |
OSHA 1910.138: No specific standard, but ANSI/ISEA 105-2016 certifies cut resistance levels (A1–A5). |
| Steel-Toe or Composite-Toe Boots |
Protects feet from falling objects, punctures, and compression injuries. |
OSHA 1910.136: ASTM F2413-18 (composite toe) or ANSI Z41-2019 compliance required in construction. |
| Respiratory Protection (Dust Masks or Half-Face Respirators) |
Filters wood dust, silica, and other airborne particles to prevent respiratory diseases (e.g., asthma, silicosis). |
OSHA 1910.134: NIOSH-approved N95 masks for nuisance dust; respirators required for hazardous exposures (e.g., formaldehyde in treated wood). |
| High-Visibility Clothing |
Enhances visibility in low-light or high-traffic areas to reduce accidents. |
OSHA 1910.144: ANSI/ISEA 107-2020 compliance for Class 2 or 3 vests in active work zones. |
| Fall Protection (Harnesses, Lanyards, Guardrails) |
Prevents falls from heights (e.g., rooftops, scaffolding) during installation or framing. |
OSHA 1926.503: Fall protection required at heights ≥6 feet (residential) or ≥15 feet (construction). ANSI Z359.11 standards for harnesses. |
Note: Employers must provide PPE at no cost to workers and ensure proper training on usage and maintenance (OSHA 1910.132(d)).
Risk Assessment Template for Common Carpentry Hazards
Proactive risk assessment identifies potential hazards before they materialize. The following template standardizes evaluations for carpentry-specific risks, aligning with OSHA’s Hazard Assessment guidelines (29 CFR 1910.119). Customize the table below for site-specific conditions.
| Hazard |
Prevention Measures |
Emergency Response |
|---|
| Falls from Heights |
- Install guardrails (OSHA: 42" high, 200 lbs load capacity) or personal fall arrest systems (PFAS).
- Use stable ladders (e.g., extension ladders with non-slip feet) and ensure 3-point contact.
- Conduct weekly inspections of scaffolding and roofs for structural integrity.
- Restrict access to unprotected edges with warning signs (ANSI A10.5).
|
- Activate emergency response (call 911 if unconscious or severe injury).
- Administer first aid (e.g., stabilize spine for suspected fractures).
- Evacuate area and report incident to supervisor/OSHA within 24 hours (OSHA 1904.39).
|
| Tool-Related Injuries (Cuts, Amputations) |
- Use tool guards (e.g., blade covers on table saws) and anti-kickback devices.
- Maintain tools per manufacturer guidelines (e.g., sharpen blades, check brakes).
- Never remove safety features (e.g., saw blade guards) or operate tools with damaged cords.
- Train workers on proper grip and stance (e.g., two-hand push blocks for saws).
|
- Apply direct pressure to bleeding wounds; use tourniquets for severe arterial bleeds.
- Immobilize amputated limbs in sterile gauze and transport to medical facility.
- Document incident for workers’ compensation claims (OSHA 1904.35).
|
| Wood Dust and Respiratory Hazards |
- Use dust collection systems (e.g., HEPA vacuums) or local exhaust ventilation (LEV) for sanding.
- Wet sanding to reduce airborne particles; avoid dry methods for hardwoods.
- Store treated wood (e.g., pressure-treated lumber) in ventilated areas to limit off-gassing.
- Rotate workers in high-exposure areas (e.g., spray booths) to reduce cumulative exposure.
|
- Move victim to fresh air; administer oxygen if breathing difficulties arise.
- Seek medical attention for symptoms of chemical exposure (e.g., dizziness, nausea).
- Report to OSHA if exposure exceeds permissible exposure limits (PELs).
|
| Ergonomic Strains (Back, Shoulder, Wrist) |
- Lift materials using proper techniques (e.g., bend knees, keep load close to body).
- Use mechanical aids (e.g., hoists, dollies) for heavy materials (>
Historical Evolution and Modern Trends in Carpentry
The craft of carpentry has undergone a transformative journey from rudimentary hand-tool techniques to highly sophisticated, technology-integrated processes. Ancient civilizations laid the foundation for modern carpentry through innovative joinery methods and structural innovations, while the Industrial Revolution accelerated mechanization. Today, digital advancements such as computer-aided design (CAD) and additive manufacturing (3D printing) are redefining precision, efficiency, and customization in woodworking. Cultural influences—ranging from traditional Japanese sukiya-zukuri to Scandinavian minimalism—further enrich carpentry’s global diversity, blending heritage with contemporary demands.The evolution of carpentry reflects broader technological, economic, and cultural shifts, with each era introducing tools, materials, and techniques that shaped its identity. Below, a chronological exploration traces key milestones, while modern trends highlight the integration of digital fabrication and sustainable practices.
Ancient and Pre-Industrial Carpentry Techniques
Early carpentry techniques prioritized durability and aesthetic harmony, often using locally sourced materials and handcrafted tools. Egyptian joinery (c. 2600 BCE) exemplified precision with mortise-and-tenon joints, visible in tombs like those at Giza, where cedar and acacia were meticulously assembled without metal fasteners. Meanwhile, medieval European guilds (12th–15th centuries) formalized craftsmanship through apprenticeships, producing intricate Gothic tracery and paneling in cathedrals like Notre-Dame. In China, the dougong bracket system (Han Dynasty, 206 BCE–220 CE) enabled multi-story wooden structures without nails, demonstrating advanced structural engineering.
"The mastery of joinery without metal fasteners in ancient civilizations underscores the intersection of geometry, material science, and cultural symbolism in carpentry."
Key innovations included:
- Egyptian dovetail joints – Used in coffins and furniture to ensure alignment and stability.
- Roman concrete forms – Temporary wooden molds (caissons) for aqueducts and domes, later influencing Gothic ribbed vaults.
- Islamic geometric patterns – Carved wooden ceilings in mosques (e.g., Great Mosque of Córdoba) showcased intricate muqarnas designs.
- Japanese sukiya-zukuri – Post-and-lintel architecture with sliding doors (shoji) and tatami mats, emphasizing natural ventilation and modularity.
Industrial Revolution and Mechanization
The 18th and 19th centuries marked a paradigm shift with the advent of steam-powered machinery, replacing hand tools and enabling mass production. Eli Whitney’s cotton gin (1793) and later John Smeaton’s sawmill designs (1750s) mechanized wood processing, while Henry Bessemer’s steel production introduced metal fasteners like nails and screws, altering structural carpentry. By the late 19th century, planers, jointers, and table saws became standard in workshops, reducing labor time and increasing consistency.
"The Industrial Revolution transformed carpentry from a guild-based craft into a scalable trade, though it also diminished reliance on hand-tool expertise."
Milestones in this era included:
- 1814: The circular saw – Patented by Tabitha Babbitt, it revolutionized lumber milling.
- 1871: The first power hammer – Used for shaping wood, precursor to modern CNC routers.
- Late 1800s: Balloon framing – A lightweight timber-framing method popularized in the U.S., replacing heavy post-and-beam construction.
- Early 1900s: Plywood development – Cross-laminated layers (e.g., Baltic birch plywood) improved structural integrity for furniture and shipbuilding.
Digital Transformation and Smart Carpentry
The late 20th and 21st centuries introduced computational design and automation, merging carpentry with engineering and manufacturing. CAD software (e.g., AutoCAD, SketchUp) replaced manual drafting, while computer numerical control (CNC) machines enabled precise, repeatable cuts. 3D printing (additive manufacturing) further expanded possibilities, allowing custom joinery and complex geometries previously limited by hand tools.
"Digital carpentry bridges traditional craftsmanship with industrial precision, enabling prototypes, customization, and waste reduction through parametric design."
Notable advancements include:
- 1980s–1990s: CAD/CAM integration – Firms like ShopBot (1988) introduced CNC routers for woodworking, used in cabinetry and furniture.
- 2000s: Parametric design – Software like Grasshopper (Rhino 3D) allows dynamic adjustments to joinery and structural layouts.
- 2010s–present: Automated joinery –
- Kappel’s Kappel 4 CNC – Produces custom furniture with minimal human intervention.
- Mass timber construction – Cross-laminated timber (CLT) panels (e.g., Mjøstårnet, Norway’s tallest wooden building, 2019) use CNC-cut components for high-rise structures.
- 3D-printed wood composites – Projects like MIT’s Wooden Robotics combine mycelium-based materials with digital fabrication for sustainable structures.
Cultural Influences on Carpentry Traditions
Carpentry techniques vary globally, reflecting climate, materials, and cultural aesthetics. Japanese sukiya-zukuri emphasizes simplicity and harmony with nature, using cypress (hinoki) and cedar for temples and residences. Key features include:
- Engawa verandas – Sliding partitions that blur indoor-outdoor boundaries.
- Tatami mats – Modular, woven-straw flooring aligned with room dimensions.
- Hidden joinery – Kumiko lattice screens and kama-ita (raised floors) prioritize functionality over ornamentation.
In contrast, Scandinavian carpentry (e.g., Dala horses, Viking longhouses) focuses on pine and spruce, with:
- Whitewash finishes – Enhancing natural grain while resisting moisture.
- Modular furniture – Thonet bentwood chairs (1850s) used steam-bending techniques for ergonomic designs.
- Passive solar design – Thick wooden walls in stuga cabins regulate temperature without modern insulation.
"Cultural carpentry traditions often encode philosophical values—Japanese wabi-sabi (imperfect beauty) vs. Scandinavian lagom (moderation)—into material choices and construction methods."
Other regional specializations include:
- Chinese ru architecture – Dougong brackets distribute weight in multi-story structures.
- African adobe and timber hybrid – Granaries* in Ghana use baobab wood for termite-resistant designs.
- Mediterranean trulli – Dry-stone and wooden beam roofs in Apulia, Italy, symbolize ancestral craftsmanship.
Carpentry is more than a trade—it is a dynamic fusion of skill, history, and innovation that continues to redefine construction and design. From ancient joinery techniques to cutting-edge digital fabrication, the profession evolves while preserving its core principles of precision, safety, and craftsmanship. As sustainability and technology reshape industries, carpenters stand at the forefront, blending age-old expertise with forward-thinking solutions to build a future where functionality meets artistry. Their work is a testament to the enduring relevance of human ingenuity in shaping the spaces we inhabit.
FAQ
What does the term "carpenter" mean?
A carpenter is a skilled tradesperson who constructs, repairs, and installs structures and fixtures made primarily of wood. They work on residential, commercial, and industrial projects, including framing, cabinetry, flooring, and custom woodwork. Carpenters may specialize in areas like finish carpentry, rough carpentry, or architectural woodworking.
What is a carpenter bee and how is it different from other bees?
A carpenter bee is a type of solitary bee that bores nests into wood, unlike honeybees or bumblebees. Males are often mistaken for bumblebees due to their fuzzy appearance, but they cannot sting. Females chew circular holes in untreated wood to lay eggs, which can damage structures over time.
What is a carpenter ant, and why are they a problem?
A carpenter ant is a large, black or reddish ant that excavates wood to nest, weakening structural integrity. Unlike termites, they don’t eat wood but tunnel through it, often leaving behind sawdust-like frass. Infestations indicate moisture issues, as they target damp or rotting wood in homes and buildings.
What kind of work does a carpenter do in their job?
A carpenter’s job includes building, repairing, and maintaining wooden structures, such as houses, cabinets, staircases, and decks. Tasks range from framing walls and installing drywall to crafting custom furniture, repairing damaged woodwork, and ensuring precise measurements and finishes. They may also work with other materials like metal or plastic in some projects.
What is a carpenter square, and what is it used for?
A carpenter square is a triangular or L-shaped tool used to mark and measure right angles, typically 90 degrees, in woodworking. It helps ensure accurate cuts, alignments, and layout work, such as marking studs, checking square corners, or verifying the plumb of walls. Common types include speed squares and framing squares.
How much does a carpenter earn on average?
A carpenter’s salary varies by location, experience, and specialization, but the U.S. median hourly wage is around $20–$30 (or $42,000–$63,000 annually). Union carpenters, master craftsmen, or those in high-demand areas (e.g., construction booms) can earn $50–$80+ per hour. Apprentices start lower, typically $15–$25/hour.
|
|
|---|
|

Leave a Comment
Comments are moderated before appearing. The data you submit is processed according to the Privacy Policy of Voltefac.